Is Apple’s native A/B testing tool worth it?
App Store Optimization (ASO)
January 11, 2022

Apple’s native A/B testing tool, called Product Page Optimization, is finally here! Ever since its announcement, ASO specialists have been wondering about it. Would it be better than the Play Store’s native tool, which already has a lot of detractors?
Introduction to Product Page Optimization
The App Store has been missing a native A/B testing feature forever. ASO specialists had to rely on external tools to test on the platform and kept waiting for a native option. In June 2021, during their annual WWDC, Apple finally announced it, along with its name: Product Page Optimization (or PPO).
With PPO you can create several product pages to test your asset. In short, here’s what you can do with product page optimization:
- Create up to 3 page variations per test
- Change 3 assets in your variations: icon, screenshots, and app preview
- Run a test for up to 90 days
If you wish to test new visual assets, they will need to be approved by Apple Review. For example, if you’re only testing your screenshot order (so just changing the order of your current screenshots), you can launch your test immediately without going through Apple Review.
PPO also implements consistency across the App Store. If you’re testing a new icon, users who’ve seen the test icon will see the same icon everywhere in the App Store (in Search results but also the Today, Games and Apps tabs) and on their device when downloading the app.
A/B testing is a great tool to help you optimize your product page. Thanks to it, you can test which of your app’s features has more traction when it comes to conversion rates or try highlighting culturally relevant content or seasonal content in some localizations.
You should note that PPO is not available for custom product pages or product pages for Apple Watch or iMessage. They can also only be seen by users who’ve installed iOS 15 (or iPad OS 15) or later versions.
Test pages also appear in Search (users will see test screenshots in search results) and they should work with Apple Search Ads in 2022.
A/B testing in App Store vs. Play Store
Both app stores’ A/B testing tools have the same confidence interval (90%). This is where the similarities end:
- With Apple’s PPO you can only run one test at a time, Google allows you up to 5 simultaneous tests
- You do not need to get your assets approved for the Play Store experiments (unlike the App Store)
- You can test alternative descriptions (both short and long) whereas you can only test visual assets on the App Store
Product Page Optimization or the big deception
PPO is still a fairly recent tool, it hasn’t yet been out for the 90 days it claims are necessary for sufficient results. However, it’s been available long enough to disappoint enough ASO professionals.
Here are a few examples of what’s not working with Product Page Optimization according to Phiture’s ASO Stack slack:
- Only one test can be run at a given time
- If you submit a new app update, your test will automatically stop (and Apple specified that stopped tests cannot be restarted)
- If you run a test in several localizations, you can’t differentiate their reporting in App Analytics
- You can’t submit a test while your in-app event (IAP) is still in review (submitting an IAP will stop your test if it’s currently running)
- Your app’s status needs to be in Ready for Sale status
- Errors have been spotted in dates and conversion rates
- Latency in results
All these are frustrating limits to a much-expected product. One of the main problems resides in the fact that a running test will automatically stop if you submit a new app version. For an A/B test to be relevant you need a long enough timeline. However, some developers update their app as frequently as every week or every two weeks, which is way too short to be useful.
In addition to that, the trust interval is only 90%, which is pretty low compared to industry standards and often deemed too low to be meaningful.
According to Scribbd, “the confidence interval is the range of values that you expect your estimate to fall between a certain percentage of the time if you run your experiment again or re-sample the population in the same way”. Having a 90% trust interval means that in 90 out of 100 times, the estimate will fall between the upper and lower values specified by your interval. In ASO, it is advised to have a confidence interval of at least 95%.
Quick tip, be sure to avoid using the word “test” in your test.
How to create an A/B test
If you can’t find the option to create an A/B test in your App Store Connect account, it may be because you haven’t applied to the App Store Connect update (made available with in-app events). If that’s the case, just click here to do it. To create a test you need to have one of the following roles: Account Holder, Admin, App Manager, or Marketing.
Once that’s done, you are ready to get started:
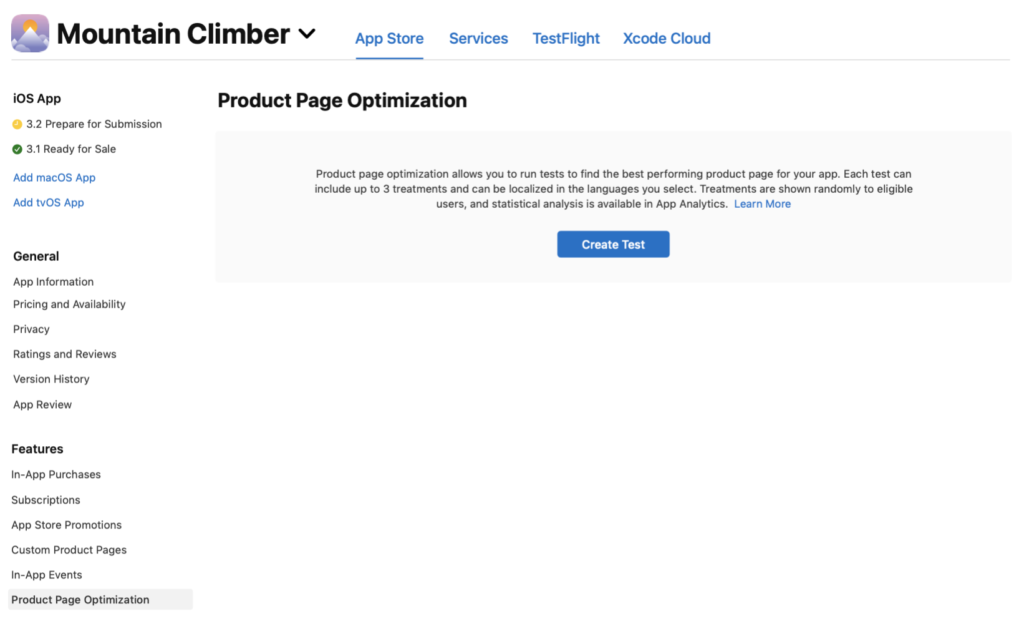
- In My Apps, select your app.
- In the left sidebar click on Product Page Optimization (it should be right under Features)
- If this is your first test, click on Create Test. Otherwise, you can click on the add button (+) next to Product Page Optimization
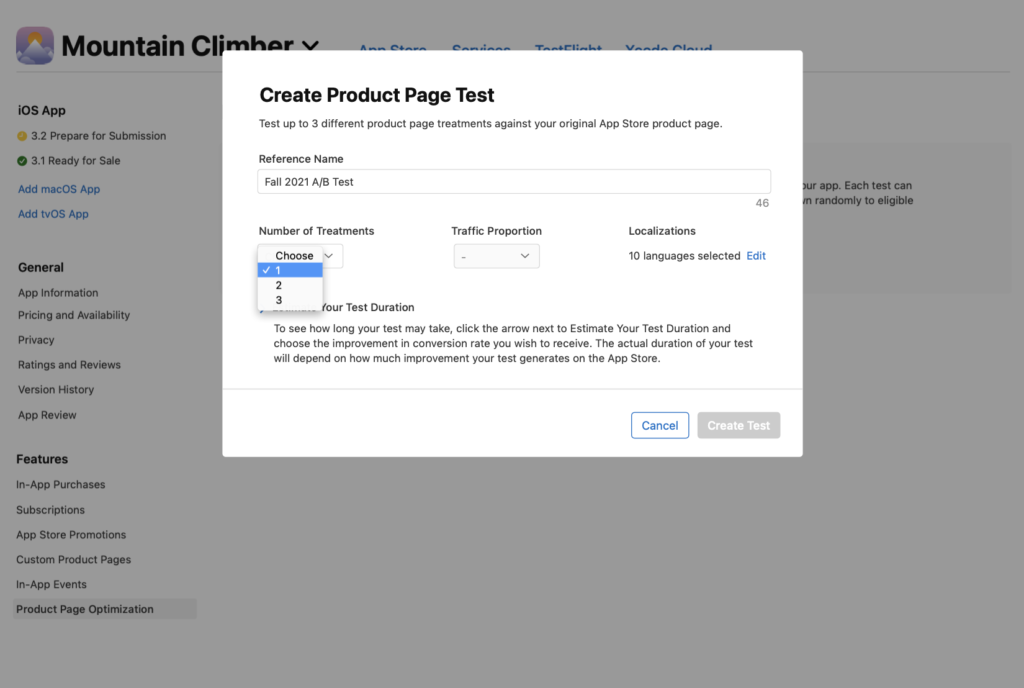
- Choose a reference name (it’ll help you identify the test in App Analytics)
- Choose the number of treatments you want (up to 3). Beware, the more treatments you add, the longer you will need to wait for conclusive results
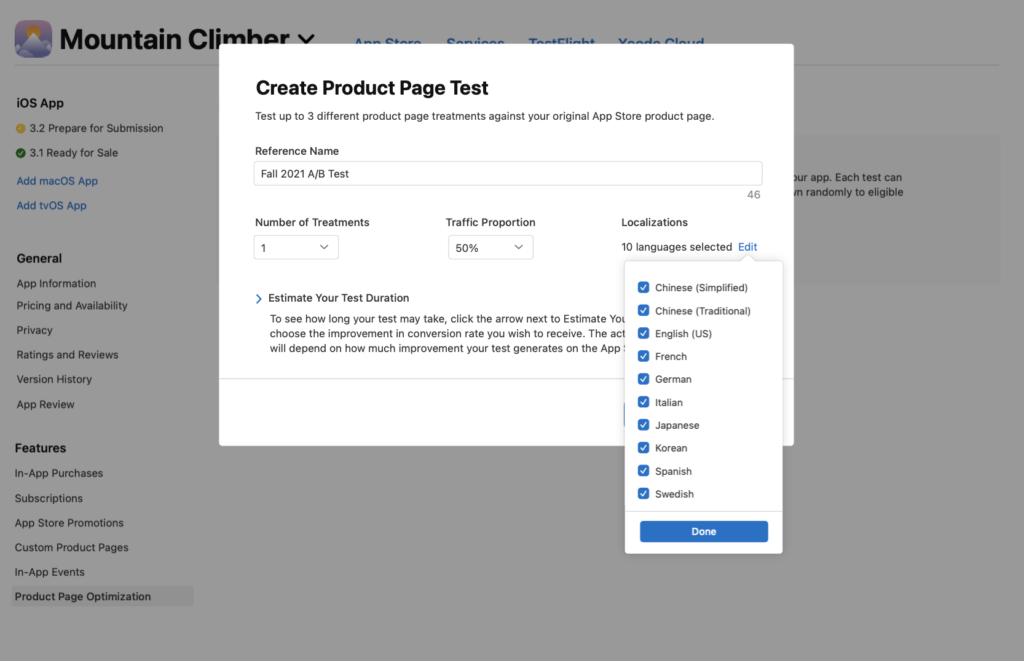
- Choose a traffic proportion (the percentage of users that will be shown a test treatment page instead of your original product page, can go up to 75%), the overall traffic proportion chosen will be split evenly between all treatment pages
- Select the localizations you wish to include (all localizations are included by default)
- Then click on the arrow next to Estimate Your Test Duration to see how long it would take to reach your goal and choose your desired improved conversion rate. A test will run for 90 days if it’s not stopped before
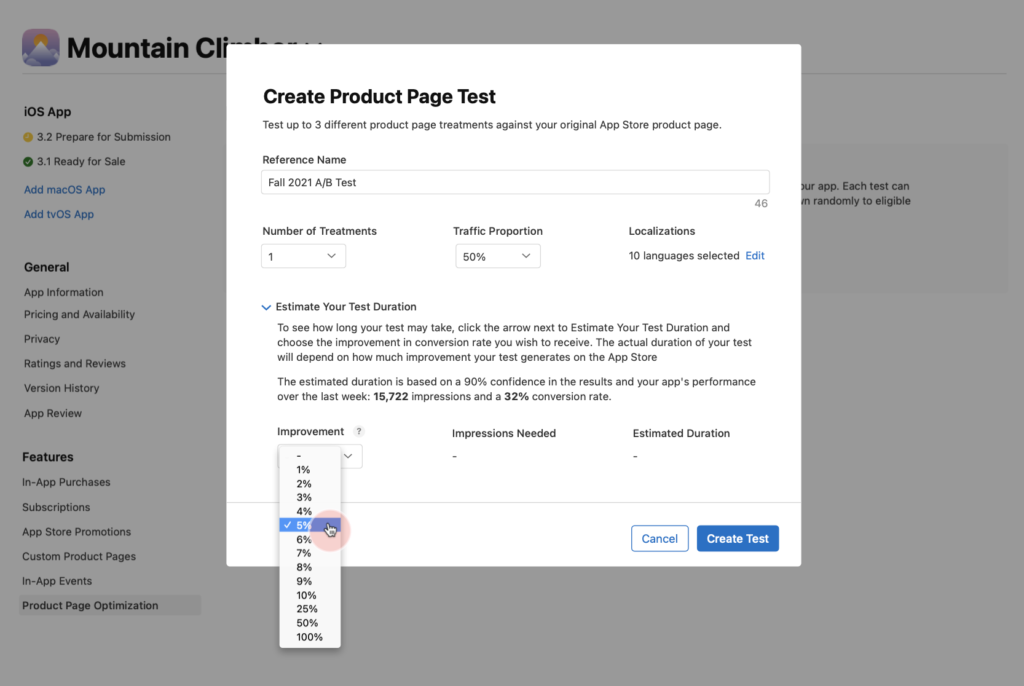
- Click on Create Test
Once your test is created, to run it, go to the Product Page Optimization page, click on your test’s name and then click on Start Test in the top right corner. Be careful, once you stop a test it cannot be restarted.
Configure your test treatment page
Be careful, each treatment page includes your app’s original icon, screenshots, and preview videos by default. You’ll have to provide alternate metadata for them, which requires to be approved by App Review before the testing can start.
Variant screenshots and app previews can be submitted to App Review independently of a new app version. If you wish to test an alternative app icon, you must include all icon variants in your app’s binary (which must be built using Xcode 13 or later).
To provide alternative metadata for your test treatment page, you should have one of these roles: Account Holder, Admin, App Manager, or Marketing. Once that’s done, follow these steps:
- Select your app in My Apps
- Click on Product Page Optimization (under Features in the left sidebar)
- The default treatment names are Treatment A/B/C. To change that, click on Edit Name next to the treatment name you wish to edit, enter a new name then click OK
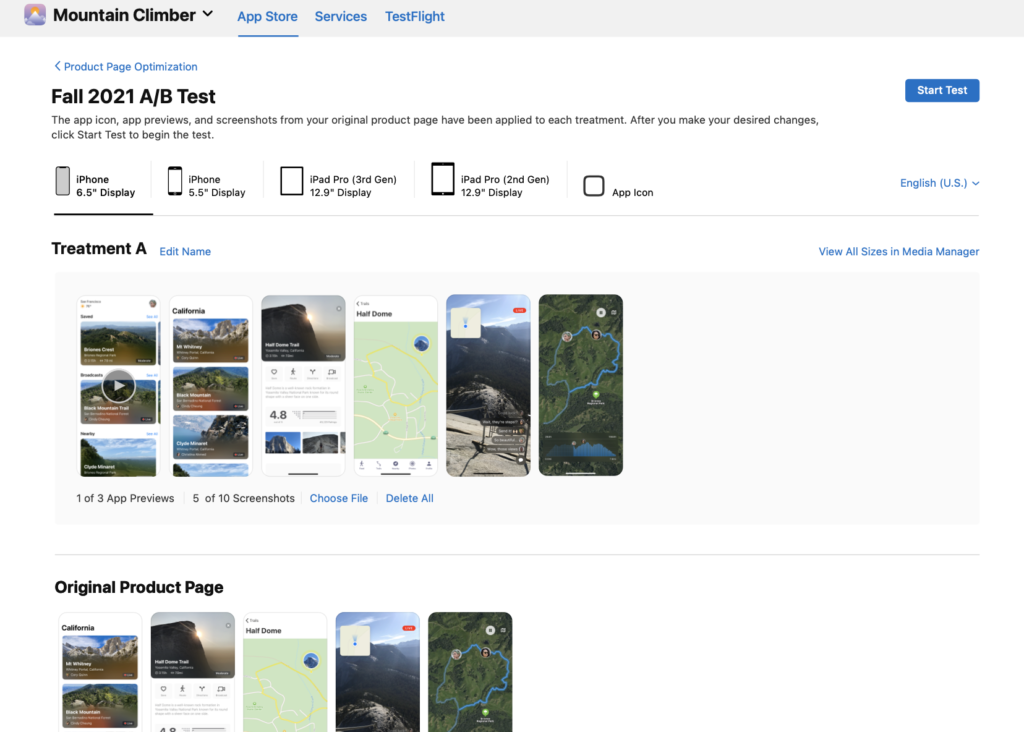
For the screenshots/app preview videos:
Click on the device tabs of your choice and add screenshots and previews, just like a regular product page.
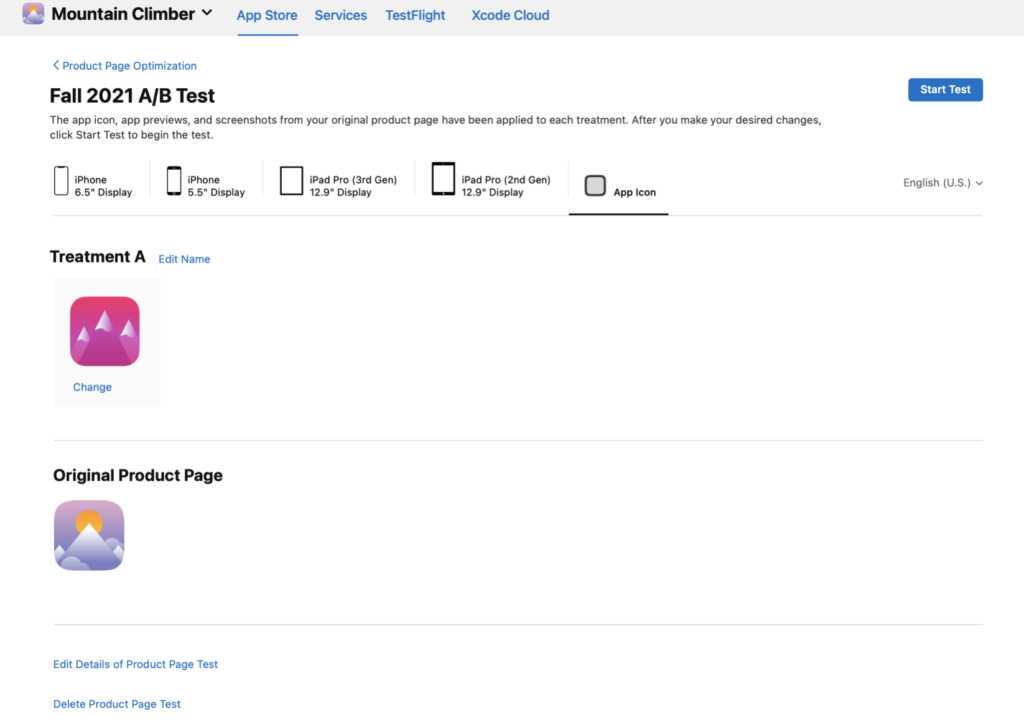
For the icon:
- Click on the App Icon tab (your app binary has to include more than one icon for the tab to appear)
- Scroll to the treatment of your choice and click Change under the icon
- Choose an icon from the menu that appears
Monitoring and applying a treatment page
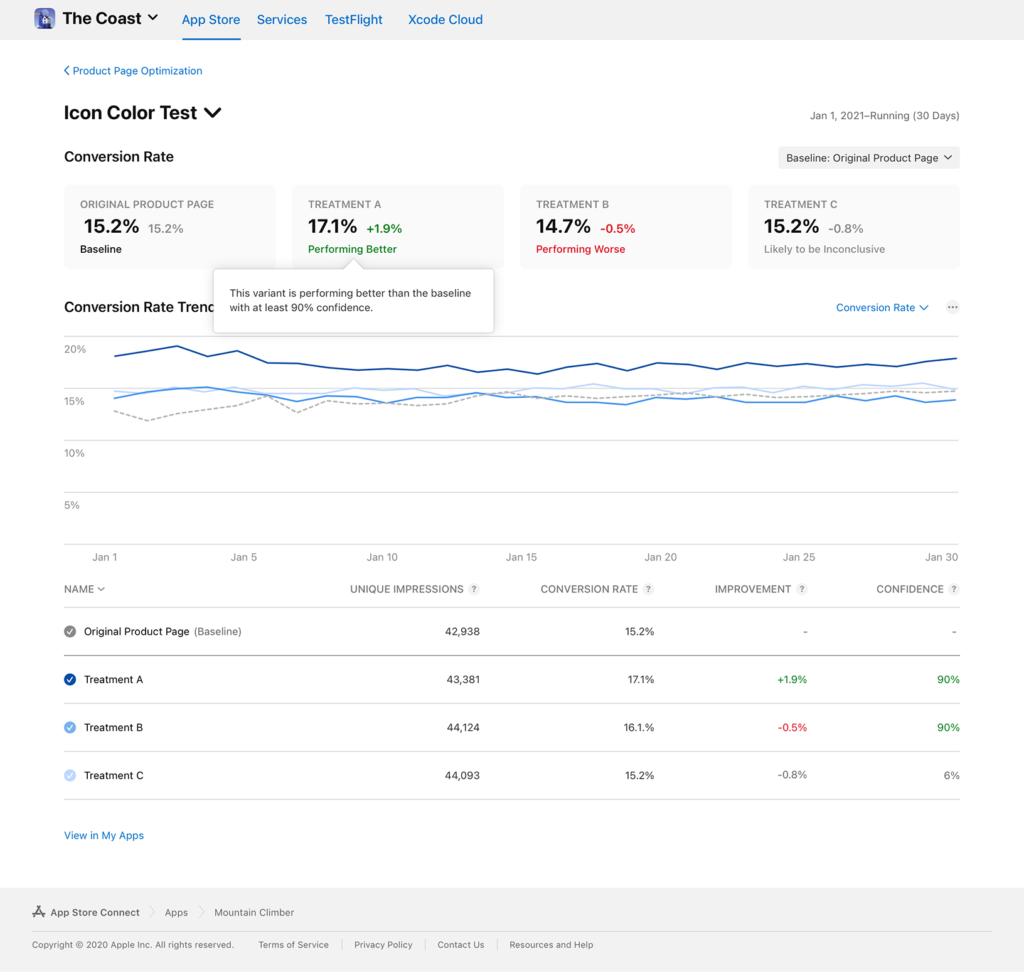
You can monitor your ongoing test in App Analytics. The performance metrics (number of impressions, conversion rate, improvement percentage, and confidence level) will be available the day after the test begins. If you’re testing several treatments you can compare them to each other by changing the baseline (which is your original product page by default).
You will also see some indicators that will show you if you require time to collect data or if one of your treatments is performing better or worse than the baseline. To see all this data, follow these steps:
- Select your app in App Analytics
- Go to the Acquisition tab
- Click on Product Pages (in the top menu bar)
- Click on your test’s name in the Product Page Optimization list (only recent and currently running tests are shown)
If your selected treatment performs better and you wish to apply it, follow these steps (you require one of these roles to do so: Account Holder, Admin, App Manager, or Marketing):
- Select your app in My Apps
- Click on Product Page Optimization (under Features in the left sidebar)
- Click on your test and scroll to the treatment you wish to use
- Select Apply Treatment to Original Product Page
- Select the app versions you want the treatment applied to
A small tip, if you decide to apply a treatment, only the screenshots and preview videos will be implemented. If you want to apply a new tested icon, you will have to include it as the default app icon in the next app version.
Will you try Apple’s Product Page Optimization? If you already have, what did you think of it? Tell us in the comments!
- Mobile Video Monthly #38 – November 2023 - 5 December 2023
- Disturbing ads, a new trend for mobile gaming creatives? - 28 November 2023
- The Power of Holiday Marketing in Boosting Mobile Game Engagement - 21 November 2023
